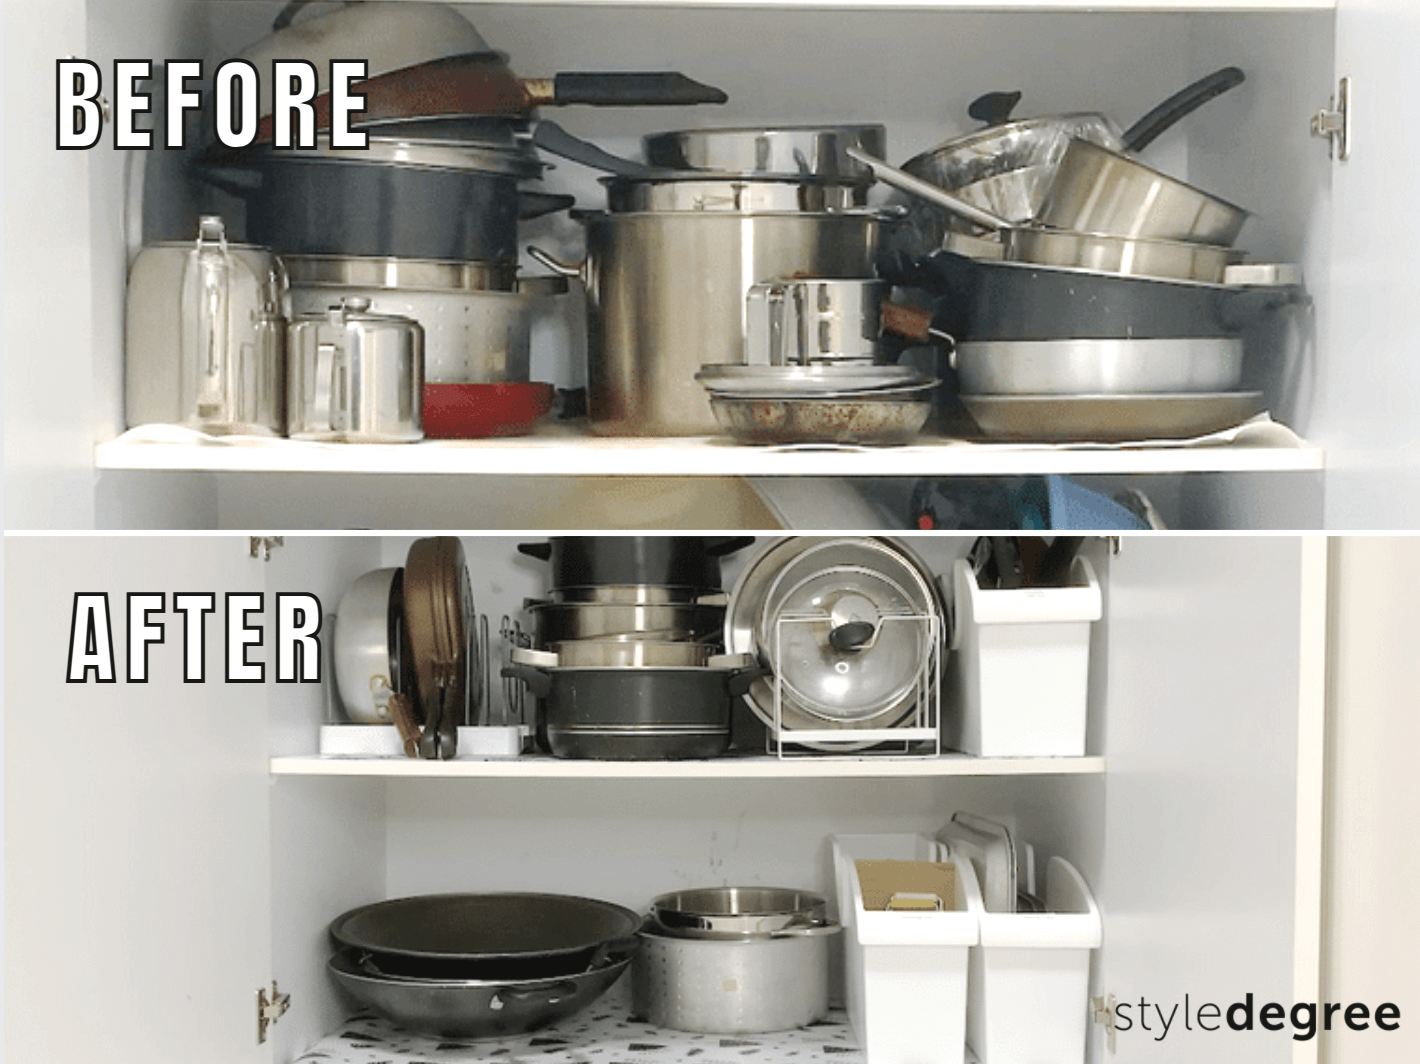
Pots and pans are essential in our everyday lives, especially for those who cook daily. However, it’s also a pain to organize due to the different heights and sizes.
As part of our “We Help Mum Organize” series, we took on the challenge of tackling Mum’s extensive collection of pots and pans. If you’re unsure on how to get started on your pots and pans organization, follow our step-by-step guide to organizing Mum’s cookware!
Watch our step-by-step tutorial on organizing pots and pans below!
Step 1: Assess Your Inventory
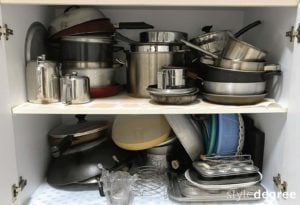
The first thing to do before organizing your pots and pans is to take everything out of the cabinets and assess your inventory. We created a pile on the floor to get a better idea of what we’ll be working with. From there, we reorganized the inventory into 3 categories: items to relocate, to keep and to discard.
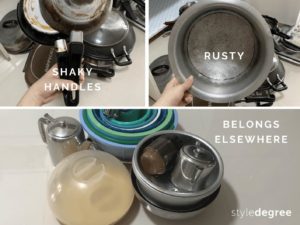
Oftentimes, Mum finds it tough to part with her beloved cookware. If your cookware shows any of these signs, you should toss it out:
- Warped cookware: Most cookware warp when there is a sudden temperature change, for example putting your pans into the sink and flushing it with water immediately after cooking. To test if your cookware is warped, put it on a flat surface and press on the handles – if it wobbles, it means that the bottom of the cookware is warped, leading to uneven heating.
- Scratched cookware: The surface of a non-stick pan scratches rather easily. If you notice that the surface is chipping off, make sure to get rid of it as the coating would end up in your food. This coating contains Perfluorooctanoic acid (PFOA) that’s been proven to have toxic effects on your body.
- Cookware with loose handles: Yes, you still can use your pots and pans without a handle. However, it’s rather dangerous – the handles could give way while you’re carrying a pan full of food fresh from the stove.
If you’re cleaning for someone else, keep in mind that you shouldn’t dispose of these items without informing them. Set it aside in a bag and check with them if it’s okay to discard it.
Step 2: Measure Kitchen Cabinet & Cookwares
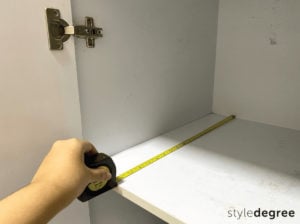
Now that you have an empty cabinet, the next step is to take the necessary measurements: the length, height and depth of the cabinet. Do double-check these measurements as it’ll serve as a guide for when you’re purchasing organizers and drawing out the organization sketch.
Remember to take the measurements of your pots and pans. It might sound weird, but it’ll prevent you from making wasted purchases on organizers that don’t fit your cookware. Don’t forget to measure the length of the handles – you want to make sure that there’s enough space for the handles to rest.
Tip: Don’t pre-purchase organizers as oftentimes, you’d end up with extra organizers or ones that don’t fit your items.
Once you’re done measuring the cabinets, place your cookware back into the cabinets. Throw away the “discard” pile and don’t forget to give your “relocate” items a new home.
Step 3: Choosing The Right Organizers
The next step is probably the step you’d look forward to the most – purchasing organizers! Organizers tend to motivate us to clean and organize our space, but as mentioned before, resist the urge to purchase before conducting the first 2 steps.
Finding the right organizers for your cabinet requires time and effort. Take note of the measurements of the organizer and cross-check with the measurements of your cookware to ensure that it fits. Ensure that each category of cookware (e.g frequently-used pans, baking sheets) have a dedicated organizer.
Tip: As you scroll through websites to find suitable organizers, look at how the product is used in the images to gain some inspiration for your kitchen cabinet organization!
Based on Mum’s kitchen cabinet, we’ve recommended to her the following kitchen organizers:
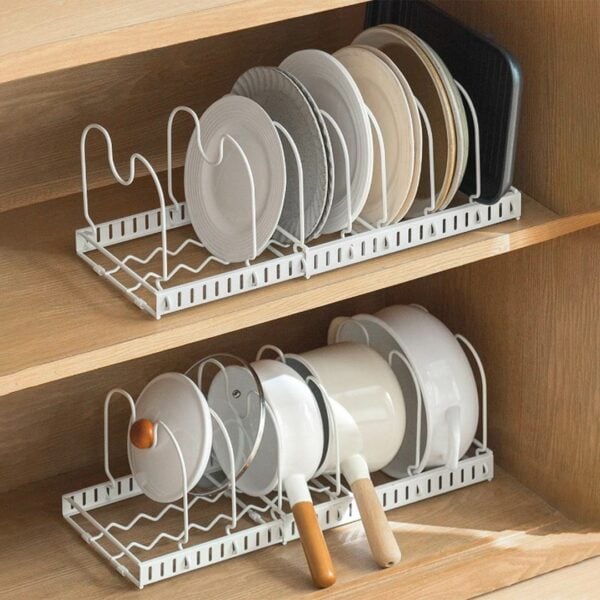
- Slim Cabinet Organizer
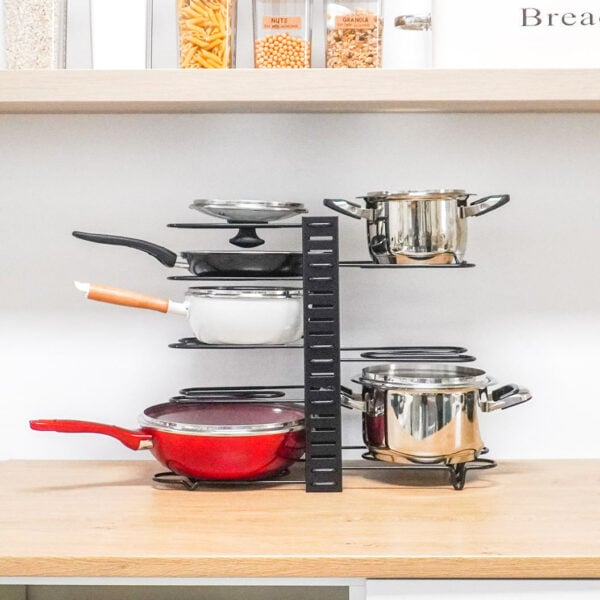
- Adjustable Pots & Pans Organizer Rack
- Luxe Lid & Board Organizer Rack
- Pattern Kitchen Shelf & Drawer Liner Mat

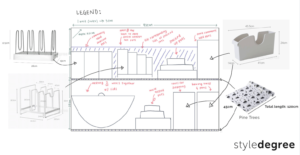
Step 4: Draw Out An Organizational Sketch
A step that we like to do before we start organizing is drawing out an organizational sketch – either on paper or digitally. Our organizational sketches are often drawn to scale with a ruler. For example, 1 cm (or unit) on a ruler is equivalent to 5 cm in real life. It gives an idea of how we’ll be using the space.
When planning out the arrangement of items, keep in mind your daily habits and needs. Your organization system should be easily maintainable.
Will you be drawing out an organizational plan too? Let us know in the poll below!
[yop_poll id=”3″]
For Mum, we stored her frequently-used items at the top front of the cabinet so it’ll be easier for her to reach it (this is a lower kitchen cabinet). Pots and pans that aren’t used as often are stored at the lower level or at the back of the cabinet. This system makes it easier for her to retrieve and return her items without creating too much mess.
Other factors to include in your organization sketch are:
- Cabinet dimensions
- Labelling of the different items
- Images and dimensions of the different organizers you’ll be using
Step 5: Clean & Line Cabinet Shelves
Once you have the organizers on hand, it’s time to start organizing. Start with removing old cabinet liners (if any) and wiping down the surfaces.

Wipe down the cabinet shelves with an all-purpose cleaner. Alternatively, you could create a homemade vinegar spray – the acidity in vinegar helps to break down mineral deposits and disinfects your cabinet.
Mix a 1:1 ratio of vinegar and warm water in a spray bottle and spray it on the surface before wiping down with a microfiber cloth.
Also check out on StyleMag: 7 Non-Toxic & Natural Cleaning Sprays You Can Easily Make At Home

Once the cabinet surface is clean and dry, place a cabinet liner – it protects your cabinets from nicks and scratches from your heavy pots and pans. It also reduces the noise made when you’re removing and returning the cookware to their respective places.


Step 6: Organizing Pots & Pans
-

- Ft. Luxe Lid & Board Organizer Rack

Swipe <- or click on image to view gallery
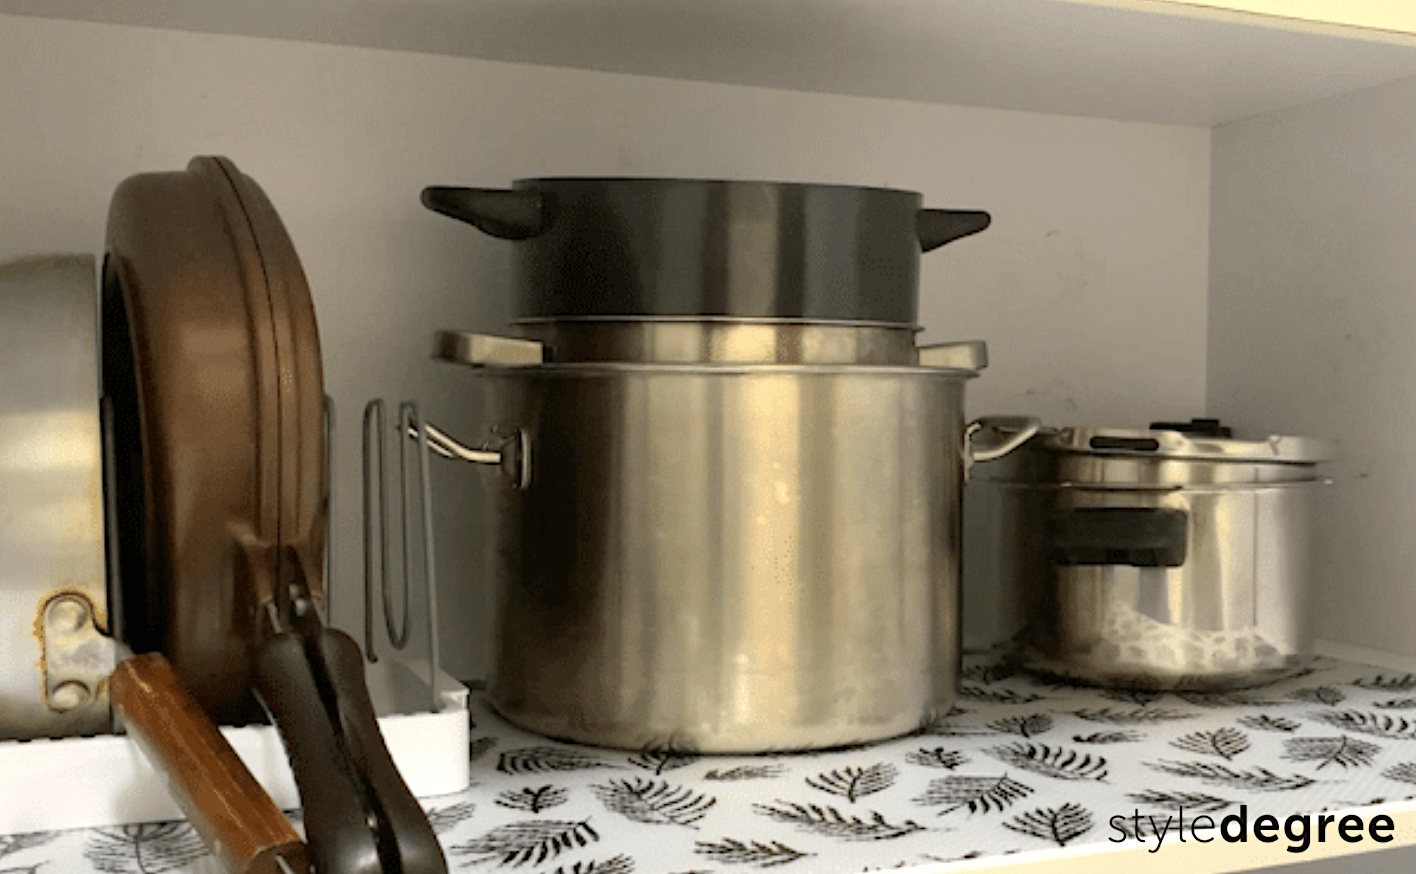
To save cabinet space, nest the smaller pots inside the larger pots and file its corresponding lids in a lid organizer. The lid organizer is placed next to the stack so that Mum can easily find the matching lid whenever she cooks.
Tip: Don’t nest more than 3 to 4 pots and pans together – it’ll be difficult for you to retrieve your cookware when you need it.
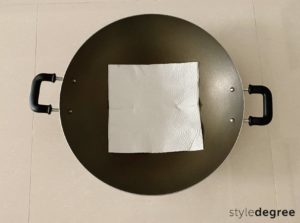
While nesting is great for saving space, it also poses a risk of scratching off the surface of your pots and pans. To protect your cookware from possible chips and scratches, line it with a paper plate or towel. This method also helps to prevent your cookware from rusting as the paper plate/towel will absorb excess moisture.

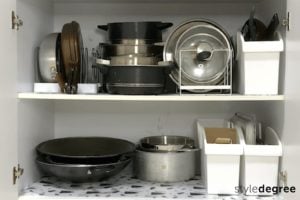
For slimmer items such as pans, baking sheets and steaming tools, keep them upright by storing it in a slim cabinet organizer. It maximises your cabinet’s vertical space while keeping your items accessible – simply pull out to retrieve. Don’t forget to label the organizers so that you and your family can easily find what they need.

For Mum’s frequently used pots, they’re filed neatly in an organizer rack – it utilises the height space in your cabinets and allows for easy grab-and-go.
Tip: Remember to factor in the length of your handles while you’re planning. Leave sufficient space for the handles to rest or else you won’t be able to close the doors due to protruding handles.
Step 7: Test Out Your New Organization System
After you’ve placed everything into your cabinets, it’s time to test out if your new organization system works for you! We had Mum try out this set-up after organizing it and it suits her. She was able to find and retrieve her daily-use items easily.
If you find that your new set-up doesn’t make it easier for you to retrieve your items, modify it to fit your needs. It’s alright if you don’t strictly follow your initial plans. There’s a lot of trial and error when it comes to organizing.
With this step-by-step guide by your side, it’s time for you to start tackling your pots and pans. You won’t feel the benefits of having an organized kitchen until you get started!
Prefer watching a step-by-step tutorial? Watch how we organized Mum’s pots & pans of various sizes!
Enjoyed this post? Join us on Instagram @style_degree, Facebook and Telegram @HomeownersSG, where we share the best home organization tips and cleaning hacks