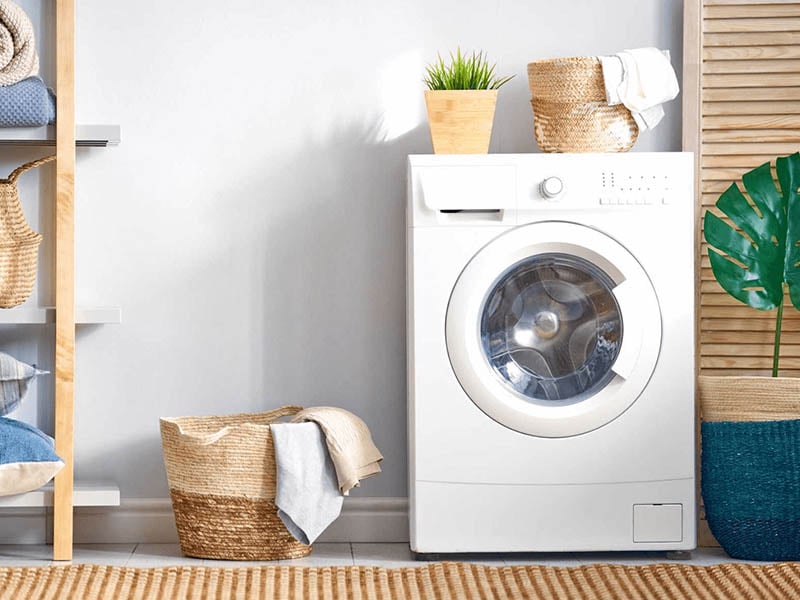
Yes, you read that right. Even your washing machines and dryers need washing. If you find your clothes smelling funky even after washing it, it’s time to give your washing machine a good cleanse.
Read on to find out how to get a sparkly clean washing machine and dryer!
Why You Should Clean Your Washing Machine & Dryer
You might think that your washing machine gets cleaned every time you do your laundry. Well, that’s not how it works. When you do your laundry, the dirt and grime from your clothes build up in the washing machine over time.
The wet and warm environment of your washing machine is the perfect breeding ground for mould and mildew. Your machine might also harbour dust, dirt and soap deposits that could cause your clothes to smell funky even after a wash.
For your dryer, the lint trap at the back of your dryer could cause a fire if left uncleaned. If you realise that you need several cycles to get your laundry dry or that your machine feels hot after drying, it’s time for you to clean your dryer.
Click below to go to the specific appliance:
How To Clean A Washing Machine

Image source: Remove and Replace
Step 1: Cleaning The Gasket/Rubber Seal
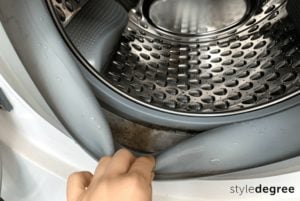
For front load washing machines, start with cleaning the gasket or rubber seal (image above) around your washing machine door. Pull the rubber seal away and start scrubbing away the dirt with a soft-bristled nylon brush or toothbrush dipped in vinegar.
Watch how we cleaned the rubber seal for a front load washing machine below!
Step 2: Cleaning The Drum
When it comes to cleaning your washing machine drum, most mainstream washing machine brands recommend using their washing machine cleaner as it has been tried and tested.
Check with the manufacturer to find out the suitable way of cleaning the drum. Alternatively, search for instructions online or refer to the user manual provided upon purchase.
If you prefer using cleaning products you already have at home, you can follow these steps:
- Pour 1 to 2 cups of liquid chlorine bleach or white distilled vinegar into the liquid detergent dispenser and run your washing machine on an empty, regular cycle in the hottest water setting. These liquids will prevent bacteria growth and disinfect the machine as well.
- After that, run your washing machine on another empty, regular cycle on hot. This is to clear any of the buildups from the first cycle.
- Use a microfiber cloth to wipe down any particles or residue in the drum.
Step 3: Cleaning Detergent Tray Dispenser
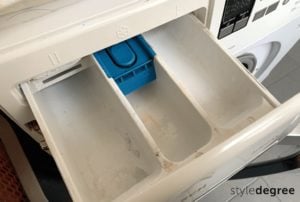
Give your detergent tray dispenser a quick clean as well. When left uncleaned, the buildup dirt could clog up your machine.
If your detergent tray dispenser is detachable, remove it and soak it in hot water and vinegar mixture before giving it a good scrub. Remember to thoroughly clean the tray dispenser compartment as well.
-
 Minimalist Collapsible Wash Basin Bucket$13.80
 -
 Minimalist Pail & Bucket (3pc Set)$18.90 – $22.90
Once it’s all dried and clean, reassemble it into your washing machine.
Tips to prevent odour in your washing machine:
- If you’re using a high-efficiency (HE) washing machine, make sure to use HE detergent instead of your normal detergent – normal detergents produce a lot more soap suds that could cause water leakage.
- Use the correct amount of detergent – it prevents excess detergent from clinging onto the walls of your washing machine and causing bad odours. Using too much detergent can also leave stains on your clothes!
Also check out on StyleMag: A Guide To Laundry Care Symbols (+ A Cheatsheet For Homeowners)
Psst! Check out our Laundry Essentials for an effortless laundry day experience!
Step 4: Cleaning Inlet Filters

Image source: Family Handyman
- Make sure your washing machine is turned off and unplugged from any power sources. Remember to close the water tap as well.
- Unscrew the hose from your washing machine. Place a bucket underneath the hose to prevent water from spilling everywhere.
- Remove the filter from the valve using pliers.
- Soak the filter in white vinegar and rinse thoroughly under warm water until it’s clean.
- Reinsert the filter to the valve and reattach the hose. Remember to turn on the water tap once you’re done.
Watch the video below for a clearer idea on how you can clean the inlet filters.
Step 5: Cleaning Drain Pump Filter

Image source: Trusted Reviews
For front load washing machines, you have an additional filter to clean – the drain pump filter. To prevent any clogging from occurring, it’s advisable to clean this filter 5 to 6 times a year. The drain pump filter can be found at the bottom left or right of your washing machine.
- Turn off your washing machine and unplug the cord to ensure that there’s no power to it.
- Locate the drain pump filter and remove the cover.
- Prepare a shallow bucket and drain the excess water from the drum through the drain hose.
- Lay a towel underneath the filter and slowly unscrew the pump filter. It’ll drain out any excess water.
- Clean the pump filter with a soft brush and warm water. Wipe it dry after it’s cleaned.
- Using a soft brush or cloth, remove any dirt and debris from the pump filter propeller to prevent any clogs from happening.
- After it’s all clean, reattach the pump filter and drain hose to their respective areas.
For a clearer idea on how to execute these steps, watch the video below!

Step 6: Clean Exterior Of Washing Machine

Image source: Freepik
Mix warm water with non-abrasive detergent and wipe down the body of your washing machine with a soft cloth. Don’t forget to wipe both sides of the doors as well. After you’re done, leave the doors and detergent dispenser tray open to allow it to air dry.
Tip: Don’t leave your laundry in the washing machine for too long. Remove it as soon as it’s done and leave the machine door open for a few hours. This is to let the moisture out and prevent the growth of mould and mildew.
Also check out on StyleMag: 7 Laundry Hacks To Prevent Damp Clothes Smell & Dry Clothes Faster
How To Clean A Dryer
Step 1: Cleaning Exterior Of Dryer
Wipe down the dryer and its control panels with a soft, damp cloth. If you see the need to clean the control panels with cleaning solutions, spray it on your cloth and wipe. Don’t spray it directly as it could cause damage.
For the exterior of your dryer, avoid using any harsh chemicals as it could ruin the gloss on it.
Step 2: Cleaning Lint Filter & Compartment
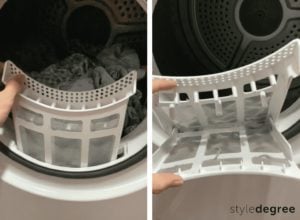
Pull out the lint filter (image above) from your dryer and vacuum away the excess lint. If you need to clean it thoroughly, wash it with warm, soapy water. Gently scrub the filter with a brush to remove any lint, rinse it and let it dry completely.
While waiting for it to dry, clean the lint filter compartment with a pipe cleaner or a small vacuum attachment to remove any remaining lint. If the compartment is detachable, take it out and give it a good shake before slipping it back inside.
After all the lint is removed, slot the lint filter back into its compartment.
Tip: Clean the dryer filter after every load – this allows more air to flow out through the vents so your dryer can work efficiently.
Step 3: Cleaning The Drum
Clean your dryer drum by removing any hair or threads that are stuck in there. For stains such as crayon or pen stain, dampen a soft cloth with a non-abrasive cleaner and wipe the drum. Then, wipe it down again with a dry cloth to remove any residue.
Step 4: Cleaning Vent Duct

Image source: Lucent Home Inspections
Unplug your dryer and pull it away from the wall. Enlist the help of a family member if it’s too heavy. While you’re at it, use this chance to vacuum up any dust bunnies at the back!
Detach the vent duct (image above) out and give it a good shake to let any of the debris out. Use a brush or vacuum to get rid of any excess lint and dust. Make sure to clean both sides of the vent duct so hot air can flow out easier.
To ensure that your dryer is working at its optimum, clear the vent every once or twice a year depending on your usage. If you find this task difficult, dryer manufacturers recommend hiring a professional vent cleaning service.
With these tips in mind, give your washing machine and dryer a good clean to ensure that your appliances are working at its optimum.
While you’re cleaning your appliances, use this time to organize and spice up your laundry area! For laundry room organization ideas, check out our StyleMag article on 10 Best Ways To Maximise Space In Your HDB Service Yard.
Do you have any other tips for cleaning your washing machine and dryer? Let us know in the comments below!


